








This product is handmade in Europe and can take up to eight weeks to arrive. No returns or exchanges accepted.
What This Is
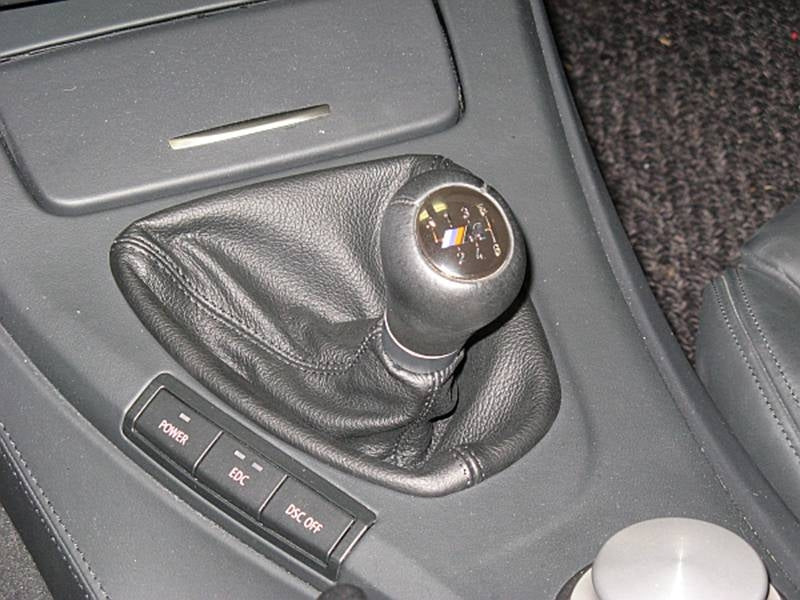
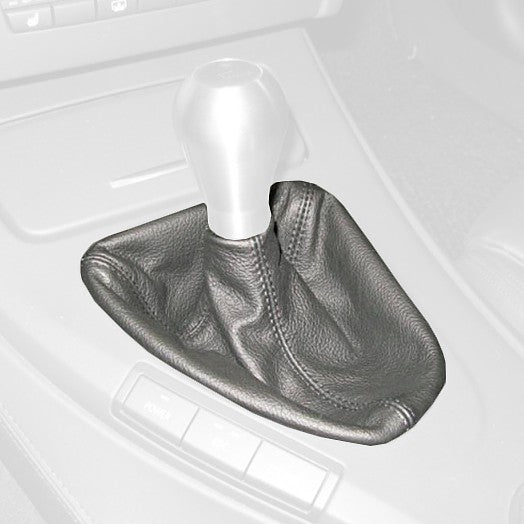
A custom-sewn leather shift boot for your 2005-12 BMW 3-Series. It's the leather only: it installs on your factory frame or trim ring. It is not a complete shift boot assembly.
What's Included
- Included: 1 leather shift boot, cut and sewn to order in the material and colors you choose.
- Not included: shift knob, trim, frames or hardware. You reuse your factory parts.
Before You Order
- Fits 2005-12 BMW 3-Series.
- It's made to order, so it can take up to 8 weeks to arrive and can't be returned or exchanged. Please double-check your year, fitment, and colors before ordering.
- International shipping: every piece ships from Poland, so a $15 international shipping charge applies to each item at checkout.
Installation
Difficulty: Moderate | Tools: screwdrivers, basic hand tools, glue or a stapler depending on your frame
You'll remove the shift knob and trim, move the new boot onto your factory frame, and reinstall.
▼ Click to Open / Close Step-by-Step Installation Guide (12 Steps)

Step 1. Non-M3: remove the shift knob if it is separate from the shift boot. This is accomplished by pulling the knob upward, some have better luck putting the shifter into 3rd gear and pulling back/up.

Step 2. After the knob is removed, the boot can be removed by pulling upward at the frame snap points starting with the front, there are four snap locations. If the knob is lighted, the electrical connector can be unplugged.

Step 3. If the knob is attached to the boot (M3), the knob can be removed with the boot now.

Step 4. Carefully separate the boot from the plastic frame: start with a razor blade, then use a flat-blade screwdriver for the rest, staying close to the plastic so you don't damage the leather. At some point you should be able to carefully peel the leather off the frame.

Step 5. Go slowly so you don't cut or tear the factory boot, in case you want to reinstall it later. You may want to try and get as much of the remaining leather off the frame to promote adhesion of the new glue and to reduce the thickness of the assembly so that it is like OE.

Step 6. Now all that remains is the plastic frame and the new leather boot. Start out by inserting the frame into the new boot.

Step 7. Next, cut slits in the 4 tabs that line up with the snap points- the cuts should be in line with the edge of the boot. Super glue works: tack the three stitched seams into the recesses on the plastic frame first, then work around the frame a small section at a time, pressing the leather and plastic together. Apply glue only where the factory had glue.

Step 8. The boot is now attached to the base and ready to go in the car. If the boot doesn't snap firmly into place, carefully trim a little more leather around the snap areas with a razor blade or wire cutters. Also, the top of the boot can be left loose on the shifter or you can use a zip-tie to anchor it to the shifter….easily done by turning the shift boot inside out, and then installing:

Step 9. Unsnap the boot by pressing the base towards the inside and pulling up. It's easiest to open the center console door and start at the top, pressing down and pulling out. Once unsnapped the zip tie holding the boot to the brake handle will need to be removed using wire cutters, the boot can then be carefully removed by sliding over the brake handle and off:

Step 10. Following step 4 above for the boot removal, the parking brake boot is removed from the plastic base. All that remains is the plastic frame and new leather boot. Start by cutting slits in the tabs at the top, then super glue them and the front seam to the plastic base. Then super glue one section at a time until it's done, cutting small angled notches at the corners so the leather wraps around the base.
Step 11. The boot should be slid over the handle and positioned so that the top seams line up with the threaded seams on the handle. The boot is zip tied to the handle, you will notice a channel that the zip tie should be placed in before tightening. The boot is then snapped back into place, it is tight so be patient.

Step 12. Snap the frame back into the center console. You are done! ENJOY!:) DCT SHIFT BOOT installation below. If you installed the e-brake boot and manual boot only, you are done at this point. Materials needed: razor knife (a hobby or X-Acto knife works well), flat-blade screwdriver, pliers, zip tie, and glue for bonding leather to plastic (super glue works).
Leather care: apply a leather conditioner with UV protection every 4-6 weeks to keep it from drying out and cracking.
Options & Pricing
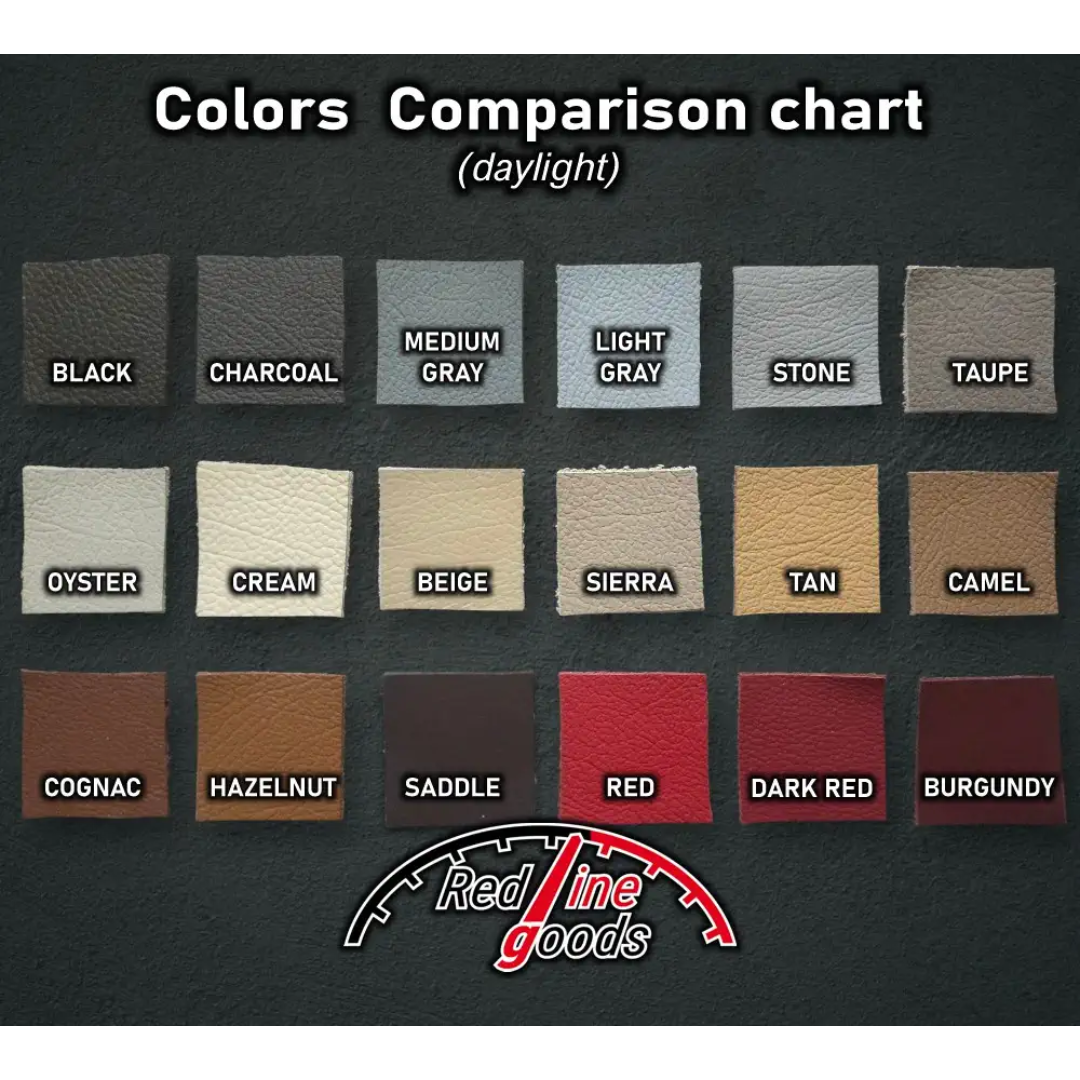
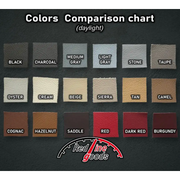
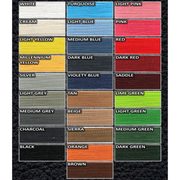
Choose your material, colors, and stitching color in the options above. Add-on prices are added in the cart.
Material
- Regular Leather
- Perforated Leather
- Nappa Leather +$15
- Genuine Alcantara +$25
- Faux Alcantara
- Carbon Fiber Vinyl
Two-tone: choose a second color in the options above.
Layout
- Default (Like My Factory Boot)
- 4 Panel (Stitching Forms An X) +$9
- Front to Back (Axis Of Car) +$9
Style
- Quadruple Thread +$9
Quadruple stitching color applies to the outer lines of thread.
Frequently Asked Questions
Q: Is my personal information kept private? Is it safe to use my credit card?
A: Yes, your personal information is kept private and it is safe to use your credit card.
Q: How much will shipping cost?
A: Unfortunately, the cost of shipping is a real expense. Our goal is to minimize your shipping costs. Shipping is calculated at checkout based on the items in your cart and will be displayed prior to you placing an order. Please note that oversized items may be subject to additional charges, which will be noted on the product page.
Q: How do I track my order?
A: Once your order ships, you will receive a tracking notification via email.
Q: Can someone outside of the United States place an order?
A: Yes, we are happy to provide worldwide service for our customers. Your shipping charges will be calculated during the checkout process. Customs and duty fees are the responsibility of the buyer.